Jun 16, 2013

Chimichurri Argentino--Steak's Best Friend!

Chimichurri, in my opinion, is one of the best sauces for steak. Chimichurri Argentino (Argentine chimichurri) varies a little from region to region but this is the basic recipe:

5 large garlic cloves
1 cup olive or vegetable oil (for this one I used half of each)
1 cup parsley
1/8 cup red wine vinegar
Salt to taste (about 3 tbs)
1 tsp black pepper
1tsp red pepper flakes

Process everything in a food processor until parsley and garlic are broken down (but don't overdo it, you don't want a paste). That's all. Easy enough right? Enjoy!

PS: You can save it in a closed container and keep it in the fridge for about a week!


May 8, 2013

Personal Pizza of the Week

Caramelized Onions & Sundried Tomatoes


This one is a no-brainer! Here are the steps to this out-of-the-box personal pizza:

1- Preheat oven to 475 degrees F.
2- Heat up 3 tbs of olive oil in a skillet and fry 1 large sliced onion until caramelized (brown and toasted). Add a little salt and 3 tbs dried oregano. Then throw in 1/2 cup of sliced sun-dried tomatoes and cook for about 1 more minute on high heat. Turn off heat.
3- Spread cheese on your homemade pita (I normally use fresh mozzarella but I only had shredded mozarella-cheddar today). 
4- Top pita with the onions mixture including the drippings from the pan and add sliced Kalamata olives and fresh Italian basil leaves. 
5- Coat pizza pan with a drop of olive oil, place pita on the pan, and bake for about 5 minutes.
6- Enjoy you personal pizza by yourself or share with someone...remember, sharing is caring!


May 4, 2013

Chicken Picatta


Ingredients

2 boneless, skinless chicken breasts
1 egg
1 cup bread crumbs
salt and black pepper to taste
2 lemons
8 tablespoons butter
2 tablespoons all purpose flour
1/2 cup chicken broth (or stock, I just save the broth whenever I boil chicken, it can last up to 7 days in the fridge and it's healthier than store-bought chicken stock)
1/4 cup capers
chopped parsley for garnish

Instructions

1- Butterfly each chicken breast, wrap in plastic and pound each breast a little. This helps make that texture a lot smoother.
2- In a bowl, beat the egg and add salt and pepper. Let chicken sit in the egg for a couple minutes
3- Remove chicken from egg mixture and bread it with the bread crumbs. Apply pressure so the bread sticks well to the chicken.
4- Meanwhile, heat up half of the butter in a skillet and once hot brown the breaded chicken on both sides (make sure it's on medium-high so the chicken can brown on the outside but not cook all the way inside).
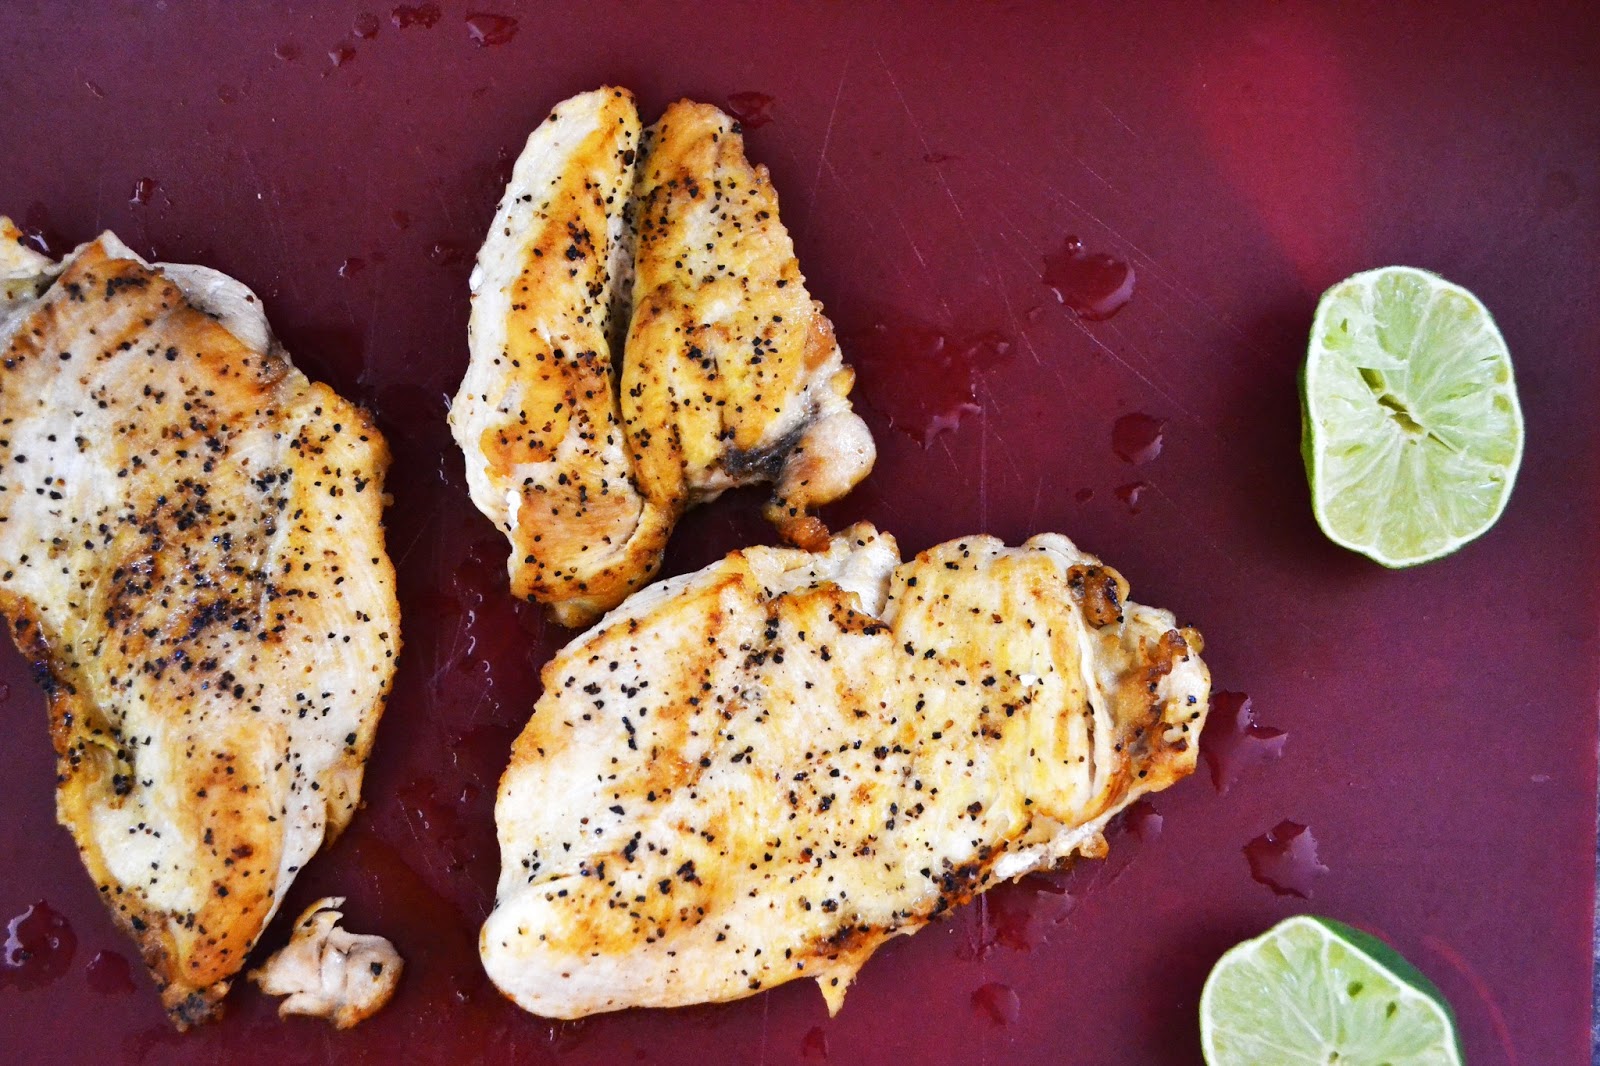
5- Once chicken is browned, put it on a baking sheet and squeeze the juice of a lemon all over chicken and then cover with foil and bake in the oven (preheated to 350 degrees) for about 30 minutes.
6- While the chicken is baking, use the same skillet used for the chicken and add remaining butter and flour and mix well. 
7- Once butter is melted and thickened, add the juice from the remaining lemon, the chicken broth, and the capers. Add salt and pepper to taste. Mix well and let it reduce until it reaches a creamy consistency and then remove from heat.
8- Check on chicken if the breasts were thick they'll take longer to cook (about 30 minutes) but if they were thin they'll be ready sooner (about 20 minutes). 
9- Plate the chicken breast and then add the sauce on top. You can garnish with lemon slices and fresh parsley. In the picture, I accompanied the chicken with a red potatoes & yam puree (click for recipe).
10- Enjoy!


Red Potatoes and Yams Puree


Okay, this is simple but a nice break from mashed potatoes. Also, it looks really bright and appealing. Here is how to make it:

Ingredients

3 large red potatoes
3 large yams
1 cup milk
1/8 cup melted butter
salt and pepper to taste
parsley for garnish

Instructions

Cut the potatoes and yams (I cut them small so they cook faster). Cook them in boiling water until soft. Once cooked, drain the water and add butter, milk, salt, and pepper. I like to use a hand mixer to get everything pureed and smooth. Serve and garnish with parsley. Voila you got a twist on boring mashed potatoes! Enjoy!


Apr 30, 2013

Beets & Parsley Salad

This is one of my favorite childhood salads: beets and parsley! It's super easy to make too! All you need to do is boil some beets (cut in quarters) for about 20 minutes, cut them up, chop up some Italian parsley and onions, and dress with salt, olive oil, and white vinegar to taste (if you are wondering, you could use canned beets, I personally don't but if you're out of time or you're just lazy go ahead and pop that can open!). That's it! I like to mix it up and then let it chill in the fridge for 15 minutes before serving. This salad is so light and fresh! Pair with a light side-soup and some bruschetta and you got yourself some great light lunch! Here are a couple of pictures of what it looks like:


Apr 26, 2013

Tequila-Lime Chicken Tacos

Hey everyone, I'm finally getting a chance to post another recipe. Let me tell you this is one of those recipes you GOTTA try!
 Here is what you do:

1- Heat up oil in a saute pan or grill.
2- Meanwhile, season chicken with lemon-pepper powder.
3- Brown both sides of each chicken breast on the pan on high heat. Once both sides are brown/charred lower heat to "medium-low" and cook chicken covered for about 15-20 minutes depending on the thickness of the breast.
4- Once chicken is cooked, throw a dash of Tequila and light it up so alcohol can burn off. Then squeeze a lime all over chicken and turn off heat.
5- Let the chicken rest for a couple of minutes before cutting.
6- While chicken was cooking, you had time to cut up your favorite taco toppings. For this recipe I recommend onions, cilantro, avocado, tomatoes, and a little more lime juice. You can also top it off with a little hot sauce if you like spicy. Here's a picture of the toppings:


 You can serve rice and beans on the side. I have a recipe for refried beans here on the blog and the rice recipe is coming soon!


Apr 13, 2013

Pasta Primavera


This is a quick, tasty, and colorful dish. It is also very easy to make. Keep in mind this recipe is allows for a lot of creativity and variations. Just make sure you use fresh, seasonal vegetables and fresh herbs. Let's go!

Boil your favorite pasta in hot water according to package instructions. Most people use short pastas but I like to use thin spaghetti or angel hair pasta. While the pasta is cooking, crush 5 cloves of fresh garlic saute in  a hot pan with 2 tablespoons of butter. Then add your favorite veggies. This time I used fresh yellow bell peppers, onions, squash, fresh corn kernels, and fresh parsley (all chopped up). Once pasta is cooked and drained mix it in the pan with the veggies and add a cup of heavy cream. Cook together for about 3 minutes on high heat. Add crumbled Feta or Roquefort cheese for a little twist. You can also sprinkle a little chopped parsley on top for garnishing. ENJOY!

Homemade Teriyaki Chicken


 Asian food is my latest challenge to conquer. I never received any training in Asian cuisine and for years my source of Chinese fair was Panda Express. Of course I was young and naive at the time. As I grew, I realized I didn't know much about Asian food even though I loved it so much. Somewhere along the way, I decided I was going to start trying to cook more Chinese food. I wasn't too driven but manage to--slowly--learn more and more. 

So here is one of my recipes I'm proud of in my conquest. I absolutely love Teriyaki chicken but I feel some sauce can be a little to heavy. I feel like this recipe is packed with flavor but isn't as heavy and thick as the conventional ones.

Ingredients:

2 lbs chicken breast
2 cups all purpose flour
pinch of salt, black pepper, cayenne pepper
1 tbs peanut oil
1 tbs vegetable oil
Veggies of your choice (I used broccoli, bean sprouts, carrots, bell peppers, and onions)

Sauce-

1 cup soy sauce
1/2 cup sugar
2 tbs cornstarch
2 tbs ground ginger
2 tbs fresh crushed garlic (you can use powder but I prefer it fresh)

Cut the chicken in medium chunks--make sure they are the same size so it cooks evenly. Throw the pieces in a bowl with flour and spices and mix well until everything is coated with flour. Let it sit for about 10 minutes.

Meanwhile, mix all the sauce ingredients together and whisk to mix it well. In a hot wok/large skillet heat up 1 tbs peanut oil and 3 tbs vegetable oil and wait for oil to get really hot. If it starts smoking it means it's getting burnt, add chicken right away. Cook chicken on high heat, mixing occasionally, for about 15 minutes and then lower heat to medium-high and cook for another 10 minutes. Remove chicken from wok and throw in veggies on high heat for about 5 minutes. Put chicken back into wok with veggies and add the sauce. Let everything cook together on high heat for about 5 minutes or until desired thickness is achieved. Serve over steamed rice. ENJOY!


Feb 10, 2013

Wild Rice Baguette Bites


I made these for a "purple-theme" event. Wild rice, also known as Forbidden rice, turns dark purple when cooked. Just slice baguette and toast in the oven. Then spread real butter on them and add a layer of wild rice. Cook rice according to package instructions--usually same rice-to-water ratio and cooks in about 45 minutes, just cook it in water, salt, and garlic powder. I topped them off with a slice of radish for more flavor and a contrasting color. They turned out delicious!

Feb 5, 2013

10 Reasons to Start Cooking and Eating At Home (and 5 Extra Perks)

1. Homemade food can be healthier than restaurant food if prepared right
2. You can cook foods that conform to your dietary needs/goals
3. You know what goes into your food and how it was prepared
4. You will save a lot more money than if you always eat out (even if it's cheap McDonalds)
5. You can impress your significant other and make them happy
6. Cooking together can be part of family time
7. You will add another skill to your belt
8. You will be able to appreciate food more
9. You won't be afraid to entertain/host a dinner party
10.You'll be in the comfort of your own home and won't even have to get ready for dinner
11.You won't have to deal with rude staff
12.Your left-over won't go yucky right away
13. Your mother-in-law might start liking you
14. Your family will love you for it
15. You won't have to take any more crap from your foodie friends about your lack of cooking skills

Feb 2, 2013

Deviled Eggs Gone Nice!


Have you ever wondered why Deviled Eggs are called "deviled?" My explanation is: deviled eggs typically include both egg yokes and mayonnaise, both packed with bad cholesterol. Now is that evil or what?! Hmm, let me see, it tastes great...but it's bad for you...hmm sounds deviled to me. But don't panic, I bare good news. I bring you the healthier alternative of deviled eggs. They are still a little evil (they still provide culinary pleasure) but with a kinder effect to your body. Many people opt for Deviled-Eggs-Gone-Nice by substituting the mayo with avocado. GENIUS! 

I'd like to take credit for the invention since I ALWAYS use avocado instead of mayo...but, I didn't come up with this version of deviled eggs. In fact, I would like to give credit to whom credit is due (and a big THANKS) but we don't really know who started the trend. Oh well, life goes on, so here is the recipe for our beloved DEVILED EGGS GONE NICE:

Ingredients

6 eggs
1 large avocado
3 tbs chopped fresh parsley or cilantro (save a little for garnishing)
1 tbs mustard
1 tbs extra virgin olive oil or lemon juice
1/2 tbs salt(or to taste)
1/2 tsp black pepper
1 tsp paprika powder (for garnishing)

Boil eggs for about 15 minutes. Once hard transfer to a bowl of ice cold water for a few minutes and then crack shells and gently remove them. Next, cut each egg in half--try to be as precise as possible-- and gently remove the egg yokes and place them in a small bowl. Add diced avocado, parsley/cilantro, mustard, oil/juice (note: cilantro will pair better with lemon juice while parsley goes better with the olive oil), salt, and pepper. Mash everything together until well mixed. Next, scoop out the mix and place about a spoonful in each egg-half. Lastly, sprinkle paprika and remaining parsley/cilantro on top. Transfer to a clean dish to serve. ENJOY!


Superbowl Food: Refried Beans Dip

Since we are in Super Bowl mode, I want to share this Refried Beans recipe with you. It has my own twist and little healthier-alternative to the typical refried beans recipe. Also, check out my Homemade Guacamole video--it's another Super Bowl favorite! You can use these beans as a dip, spread, stuffing, side dish, and much more if you get creative!  I'll be adding more recipes today as well! ENJOY!


Jan 10, 2013

Homemade Chunky Guac


This is one of my first video blogs! I do sound a little nervous but hopefully that'll improve with time. However, the star of this video is the guac, so test it out at home and ENJOY! 


Aug 19, 2012

Ground Whole Wheat Spinach Feta Side-Dish


What I love about this recipe is its simplicity yet flavorful taste! Also, as if that wasn't enough, it is super healthy and it makes a great side dish. 

Here is what you need:

1 garlic clove crushed
2 tsps extra virgin olive oil
2 cups baby spinach
1 1/2 cup boiling water
1 cup ground whole wheat
1/2 feta cheese
1/4 cup lemon juice
pinch of salt

Instructions:

Boil water with a little salt in a sauce pan and add whole wheat. Cook until all the water is  gone and grain is tender, remove from pan and let it cool a little. Meanwhile, heat up olive oil in a pan, add spinach, garlic and a little salt. Saute for a few minutes until spinach is tender and bright green. Don't overcook! Add cooked whole grain, lemon juice, and feta cheese. Mix together and let it cook for a couple minutes so the flavors mix. 

Remove from heat and let it cool for a couple minutes before serving. When plating, sprinkle a little feta on the top, fresh basil, and a little olive oil. Enjoy!


Jun 21, 2012

Bucatini Pasta with Red Sauce


Let me start by saying that I LOVE Bucatini pasta. When I was a little girl, I would suck in the bucatini noodles and wait for the little splash of sauce on my face when I reached the end...okay I was very little when I did that. But I always continued to love this pasta. It's thick and filling. The hole in the center of each noodle allows it to take in more sauce than your average spaghetti or other pasta. Because Bucatini takes in sauce so well, I like to make it with a rich and meaty sauce. You can find Bucatini at most grocery stores but they don't have that many so you have to look look for it. I've noticed that not a lot of people are familiar with it but trust me once you try it I think you'll love it. So here is the recipe I like to use for Bucatini. Of course, you can use any red sauce but I recommend this one. Here's another picture...

Instructions:

In a medium sauce pan heat up 1/3 cup olive oil, 4 garlic cloves, and 1 cup minced onion until caramelized. Add 1/2 cup shredded carrots and cook until soft. Add 1/2lb lean ground beef. Once brown, add 2 tbs oregano, 2 tbs parsley, 2tbs  basil, 1 bay leaf, 1tbs black pepper, 1tsp cayenne pepper, 1/2 cup granulated white sugar, 1tbs cumin, 2tbs salt. Stir well and cook together for about 3-5 minutes. Add 1 can diced tomatoes, 1 cup tomato sauce. Stir and cover. Cook on low heat for 15 then add 1/2 cup water, stir and cook another 30 minutes. Check for salt...you can add a little more to taste. I find the taste changes a little after cooking, so check as you go and feel free to add more herbs and spices if you'd like. Cook according to instructions on package, drain, and put it in the sauce pan and let it sit in the sauce for 10 minutes before serving. You can sprinkle cheese on top, but in this case I like to enjoy the bucatini with the juicy sauce on their own. ENJOY!

Eggplant Mayo

First thing I want to say about this recipe is that it's way healthier than actual mayonnaise. It's prepared with olive oil, no eggs, and antioxidants-rich garlic. Also, it has a unique flavor. I learned this recipe from my mom...like most of the stuff I know. This recipe is genius! You can use it as a dip, spread, or filling.


Dice two large egg plants and boil until soft. Once tender drain and put in a blender with 1/2 cup extra-virgin olive oil, 2 garlic cloves, and salt and pepper to taste. Blend well. Pour out in a container, cover, and refrigerate. Serve and a bread spread or dip. ENJOY!

Light Side-Soup

I don't know if it's an Argentinean tradition or just a family one, but ever since I was a kid we always had a "side soup" when eating homemade pizza. Soup goes perfect on the side because as yummy as pizza is, it's always nice to have something liquid in contrast with the crunch and gooey-ness of pizza. When we make a side soup though, it's always something simple and light, so it doesn't steal the spotlight of our homemade pizza nights. I wanna share this recipe because this soup good can be used on the side of other foods or as a first course. This soup is so simple and light.


Ingredients

2 potatoes peeled, diced
1 package peperini or orzo pasta
1 small onion finely minced
3 garlic cloves
2 tbs dried parsley
2 tbs dried oregano
2 tbs extra-virgin olive oil
1 tbs red pepper flakes
1 tbs ground black pepper
Salt to taste

Instructions

In a medium sauce pan saute onion and garlic, add water according to package directions, then add potatoes, parsley, oregano, red and black pepper and salt. Let it boil for a while and then add pasta. Cook according to package instructions. Enjoy with your favorite entree!

Shredded Chicken Tostadas

Chicken tostadas are quick, nutritious, and delicious. My little sisters love them too because they get to assemble their own and choose their toppings. When it comes to tostadas there isn't really a specific recipe but it's more about what you like and what you feel like eating at the time and throwing it in a tostada tortilla, which is like a giant tortilla chip; basically, it's a corn tortilla that's been toasted/baked and is therefore super crunchy. Here is a pic of the end results:


In this case, I used my homemade "refried" beans (recipe coming soon), shredded chicken breast (skinless chicken breast, boiled, cooled, and shredded), romaine lettuce, hard-boiled eggs, diced roma tomatoes, diced onions, cilantro, homade guacamole, and "queso fresco" which is a Mexican fresh cheese--you can also just use parmessan cheese. You can pick any ingredients you'd like and just throw them on the tostada and VOILA you got lunch ready! You can always top with spicy sauce and try my recipe for Green Salsa! ENJOY!

Just look at that! So fresh and filling!


Garlic Sausage Sauteed Rigatoni

I came up with this pasta on a day when I was bored and wanted to try this garlic sausage I bought at Sam's Club and just make something different. Forget cooking your pasta in boiling water as usual! By sauteing the pasta we are adding tons more flavor and a little crunch to things! Not to mention the appealing color and character of the dish. One of the things I love about cooking is that it really is pure art! You start with a blank canvas and you can take it any direction you'd like. One of the most important things when cooking is not to put yourself in a box. The kitchen is your shrine and you're a food god of cuisine when you're in it. You are free to experiment, play, taste, and do whatever you want with your creations. I'm telling you this because that's how I cook most days. I'm not the kind gal to follow a recipe even when I try, somehow I always end up adding my own twist. Once you get used to cooking and EATING, your palate will be the "intuition" that will tell you what might taste good together and it'll help you get creative in the kitchen. This recipe was all spur-of-the-moment but it came out so good! So here it is...

Ingredients

1 package Rigatoni Pasta
1 cup parmessan cheese
2 cups sliced sausage of choice (I used a "garlic" Italian sausage)
3 cups milk
6 garlic cloves minced
1/8 cup dried parsley
3 tbs extra-virgin olive oil
3 tbs corn starch
Salt and pepper to taste


Instructions

In a large skillet saute garlic and sausage in olive oil. Then add rigatoni in the pan and brown/toast but make sure they don't burn. Once pasta has a brown "toasted" color add salt, pepper, and parsley and stir in. Then add 2 1/2 cups milk and let pasta finish cooking at medium/medium-low heat covered. Stir occasionally to make sure milk doesn't boil (it helps if the skillet is a little deep so things don't spill). Once pasta is almost al-dente (look at package cooking times) mix the remainder 1/2 cup of milk with the corn starch and add to the pasta. Cook about 5 more minutes to make sure the starch flavor disappears and sauce gets thick. Stir occasionally. Once pasta is tender turn of heat, add parmessan cheese and mix, and let it sit for a couple minutes. When you plate it you can add a little more cheese on top. ENJOY!


Tastemakers 2012

I first heard about Tastemakers last year when my friend Isabel invited me to volunteer with her one day for a free ticket for the next day. She told me it was in downtown Salt Lake and that we would get to taste food from different restaurants in the area...TASTE FOOD?...umm of course I was sold! I really enjoyed the event and the chance to try some restaurants I hadn't tried before. So this year when the event came around again I immediately added my hubby to the volunteers list and off we went. My favorite this year was The Naked Fish. They had the best sushi I've tasted in Utah so far and I got to eat two samples since Quentin doesn't eat  raw fish. It was so good I can't wait to go back and have more of their sushi. Here is a picture of their sample. The fried calamari was really good too and it got past my reservations about squid.


My second favorite was the Pollo A la Gratella from Caffe Molise. Sadly I don't have a picture of it but it was pretty tasty. It was Quentin's favorite as well. The chicken was served with angel hair pasta and a creamy sauce with Gorgonzola cheese, artichoke hearts, and sun-dried tomatoes.

For a more casual meal we enjoyed the Buffalo Wings at Squatters. We went want a week later for those wings. Even though the sauce is spicier than I'm used to, I loved the flavor so much I still ate them.

Overall it was a fun experience and I'm glad I got the attend the event for the second time. I also invited some friends to it and I would encourage anyone to go and have stroll downtown Salt Lake while trying our local restaurants and just enjoying the night with friends. I thank Salt Lake City Magazine for organizing the event and allowing me to be part of it. Here is a link to the website if you'd like to check it out.


Mild Salsa Verde (Green Sauce)

Mexican cuisine is one of my favorites in the world. Long ago I decided I was to learn how to make authentic Mexican recipes from native Mexicans. Here is the recipe for Salsa Verde or "tomatillo sauce" I got from one of the best Mexican cooks I've ever met. She isn't an executive chef at a fancy restaurant or a food writer but her food is so delightful I can never get enough. I'm so glad she shared this recipe with me and I'm even happier to share it with you.

This salsa is so versatile you can use it on so many Mexican recipes but also on other things such as scrambled eggs, rice, salad, you name it. It tastes so fresh and a little "lemony" even though it doesn't call for any lemons. It is also low on calories and fat-free which makes a perfect replacement for salad dressings, dips, or marinades. So let's get started:

Ingredients

4 large/medium tomatillos
2 cups fresh chopped cilantro
1 garlic clove
1 small jalapeno pepper (seeded)
3 cups water (from the tomatillos)
1 tbs salt or to taste

Instructions

Boil tomatillos in medium pot until soft. Meanwhile place jalapeno on a griddle or pan and let it char on each side until outside of skin is all black. Then peel of the outer skin and rinse. In a blender mix tomatillos, jalapenos, garlic, cilantro, salt, and water from the tomatillos (it adds a little more flavor). Blend everything together, pour in container, and refrigerate until cool. If you would like it a little thicker you can use less water or more water for more runny. Also if you are like me and love cilantro feel free to add a little more to taste. Once cold, use it on your tacos, quesadillas, "green" enchiladas,or even on steak, grilled chicken, salad, etc. Buen apetito!!!


May 9, 2012

Fresh Jicama Salad

Fresh Jicama Salad

Jicama, jicama, jicama...what is that? I had heard the word a couple times from different Mexican friends, but I never really inquired about what it was. The other day, my little sister came home from school RAVING about jicama and how good it tasted with lemon. She also said that some people add both lemon and spicy sauce but she didn't enjoy the latter. For a couple days she kept begging for us to buy some jicama. So, when we finally got it I was a little confused. It looked like a root vegetable--something like a potato or a yam? It didn't look very appetizing as I don't think of foods in that category as appealing unless they are cooked. But my sister insisted I try some with lemon. 

Jicama has a very mild flavor, somewhat that of a potato but not as starchy. It is also crisp and somewhat juice. Kind of like an apple. As I was chewing it I started to feel it'd pair well with yogurt, vinegar, lemon juice, and the such and I immediately thought of a salad! So here is what I came up with. This salad is so fresh and inviting and also very healthy! Here is a picture followed by the recipe:


Ingredients:

Jicama
Green apple
Red onion
Cucumber
White vinegar
Olive oil
Greek Yogurt
Honey (optional)
Salt to taste

Just cut everything in cubes (your preferred ratio of each thing). In a bowl whisk together the Greek yogurt, white vinegar(you can also try lemon juice), honey, olive oil(just a little bit to emulsify but you don't want it oily, about a teaspoon should do), and salt to taste. Once dressing is well combined, add to the rest of the ingredients. Also, I put everything in a closed container, shook it up, and put it in the fridge for over an hour so it would be really chilled by the time I served it. For serving suggestion, I served it  in a bowl and was very generous with the dressing so that everything was kind of "floating" in it.  It was SO delicious, especially picking up the bowl at the end and drinking the left over dressing from it! You can also sprinkle minced fresh mint for garnish and aroma right before serving.This salad is ideal for the summer, a must try! ENJOY <3

Apr 12, 2012

Super Yogurt Smoothie

Super Yogurt Smoothie
Blend: 
2 cups Vanilla Yogurt
1 cup Peaches, Pineapple, Strawberries, Mango, Raspberries
2 tbs Honey
1 tbs Chia Seeds
1 tbs Ground Flax Seeds
1 tsp Lemon Juice
Ice

This Smoothie is a great and tasty way to start your morning! Each ingredient is rich in nutrients and essential vitamins:

YOGURT-- it's a great source of protein and calcium; also, it contains "good bacteria" that your body needs and vitamin D!

FRUITS-- this combination of fruits includes cancer fighting properties, vitamins, anti-oxidants, and many more benefits to keep us healthy and beautiful.

HONEY-- it boosts our energy, it has anti-bacterial properties, and is  a better alternative to white sugar.

CHIA SEEDS & GROUND FLAXSEED-- packed with omega-3s and 6s, fiber, calcium, antioxidants, and proteins all in a teaspoon without the high calories!

LEMON JUICE-- vitamin C, cleansing properties, and it even helps reduce stress!


Feb 4, 2012

DULCE DE LECHE FLAN


Ingredients

3 large eggs
2 cups sugar
1 can evaporated milk
½  cup condensed milk
½  cup dulce de leche
2 tablespoons vanilla extract
1 teaspoon lemon juice

Makes 8 servings/ serving size 1 ramekin

Preparation

  • Preheat oven to 350˚ F.
  • In a small sauce pan put sugar on medium heat and let it caramelize until golden brown.
  • Meanwhile, beat egg whites first until creamy and then add the yolks. Beat until well combined.
§         Warm up the dulce de leche with the evaporated milk for 30 seconds in the microwave and then mix well. Add to the egg mixture along with condensed milk, vanilla extract, and lemon juice. Mix for about 3 minutes. Make sure it’s smooth.

  • Once sugar is ready, pour in equal amounts onto the ramekins or your preferred dish. Let it cool for a minute before adding egg mixture.
  • Strain egg mixture with strainer or cheese cloth and pour into ramekins or pan.
  • Place ramekins on a baking dish in a 1 or 2 inches water bath and cover with aluminum foil and put it in the oven.


  • Bake it for 1 hour.
  • Remove from over and let them cool in room temperature.
  • Refrigerate flans for at least two hours before serving.


  • To serve, run a knife along edges of ramekins and flip over on little plates.
  • You may garnish with mint, whipped cream, strawberries, shaved chocolate, etc.

ENJOY! <3

Feb 3, 2012

CRANBERRY SANGRIA


Valentines Day is coming up, spice up the typical wine with cranberry juice and infusions of your favorite fruit! The beauty about sangria is that you can get creative and add pretty much any fruit or flavors you’d like. You don’t need an expensive wine and it so refreshing and appealing to the eye. Now, always try flavor combinations that go together and remember practice makes perfect.

Ingredients
 1 bottle dry red wine
1 cup cranberry juice cocktail
1 cup orange juice
½ cranberry liqueur
1 orange cubed
1 apple cube
1 pear cubed

Combine all ingredients in a pitcher throw in the fridge for at least 2 hours (the longer the better). Once ready to serve pour it in glasses with ice and if you want to spark it up add a little Sprite.

Suggestion: Sangria pairs up especially well with red meats, pork, sausages, and pasta. Also, include a little spoon to try the fruit in the glass. Enjoy!